

| You are here: Home » Import CAD Formats » NGRAIN's 3KO Solutions |
Support: 905-672-9328 Copyright © 2026 Okino Toronto, Ontario, Canada. |
Materials and texture maps are assigned to mesh objects in COLLADA files via material definitions. This panel controls the output of the material definitions, their associated texture maps, and provide fine grained control over the tweaking and modification of each COLLADA material property.
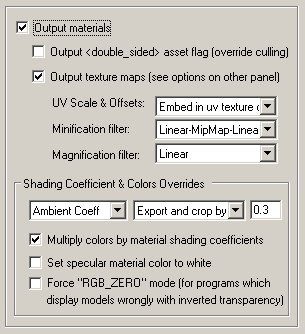
Output Materials
If this checkbox is checkmarked then materials will be exported to the COLLADA file.Material properties exported include:
- Ambient color
- Diffuse color
- Specular color
- Luminous (emission) color
- Opacity
- Phong shininess (power)
Output
asset flag (override culling) Enabling this option will force theasset flag to be output and set to 'true' in material definitions. Refer to the extensions section for a syntax description. This flag suggests to downstream COLLADA viewers to turn off back-face culling so that all polygons will be visible within a scene. Output Texture Maps
If this checkbox is checkmarked then 2D texture maps that have been assigned to the material definition(s) will be exported to the COLLADA file.UV Scales & Offsets
Each texture map reference used in an Okino material allows for the texture map to be scaled and offset in "UV space". This combo box determines how this scale and offset information is output to the COLLADA file.Do not output (ignore)
The information is not output. You would normally not want to use this option since the applied textures will look wrong if any of them have scaling or offsetting.Output in material definition (default)
The texture's UV scale and offset values will be output inside specialtags, as outlined here. Embed in uv texture coordinates of mesh geometry
The texture's UV scale and offset values will be embedded directly into the mesh's uv texture coordinates. If a mesh has diffuse, specular and luminous texture maps, all with different scale & offset values, then the scale and offset will only be taken from the diffuse texture map.Minification and Magnification Filters
These combo boxes allow theand parameters of a 2D texture sampler to be directly specified. In general you will probably want to use the default values in most cases. They are used in the downstream COLLADA viewer or program to determine how texture maps are to be down-sampled and up-sampled. Shading Coefficient and Colors Overrides
These combo boxes provide hands-on control over how exported material shading parameters should be modified so that the exported model can be rendered nicely as it would have looked in the source 3D program. The two combo boxes and the single numeric text box provide you good control over the ambient, diffuse, specular, luminous, opacity and shininess shading coefficients exported to COLLADA.The first drop-down combo box selects which of these shading parameters is to be modified. Each shading coefficient has its own operation that can be selected (via the second combo box) and an optional numeric text value (via the third data entry text input box). The following describes the various shading parameters that can be controlled:
Ambient Coefficient: This controls the amount of color reflected from an object based on the ambient light in a scene. A good default value is 0.1 through to 0.3 and ideally ranges from 0.0 to 1.0.
Diffuse Coefficient: This controls the amount of color reflected from an object based on the direct light shining on it. A good default value is 0.4 and ideally ranges from 0.0 to 1.0.
Specular Coefficient: This controls the intensity of the highlight color on an object. A good default value is 0.7 and ideally ranges from 0.0 to 5.0.
Luminous Coefficient: This controls how much color is added directly to an object, regardless of any light that shines on it (the higher the value, the more the object will appear to glow). In general this value should be kept at 0.
Opacity: This is the inverse of transparency. 0.0 will make the object fully transparent, while at 1.0 the object will be fully opaque.
Phong Shininess: This controls the width of the specular highlight seen on an object. An ideal range is 6 (very wide) to 300 (very narrow). The default is 32.
For each material shading parameter, several actions can be performed on each material shading parameter during the import process:
Do Not Export: When this option is selected, the shading parameter is set to 0, effectively making the shading channel appear black (for color channels).
Export Unchanged: When this option is selected, the shading parameter is exported as is, with no change.
Set and Use Default: When this option is selected, the shading parameter is set to some "good" default value (as determined by the export converter). This default value will be displayed in the input text box.
Set to Specific Value: When this option is selected, the exported shading parameter will be overridden with the user specified value of the numeric input text box.
Export and Crop by: When this option is selected, the shading parameter is exported and will remain unchanged if it is less than the numeric text input value shown on the dialog box. If it is greater, then the exported value will be clamped to be no greater than the numeric type-in value. This is a good operation, for example, if you do not wish for the ambient shading coefficient to be greater than 0.3.
Export and Scale by: When this option is selected, the shading parameter is exported and multiplied by the numeric input text value shown on the dialog box
Normalize Color and Coefficient: When this option is selected, this option only applies for the ambient, diffuse, specular and luminous shading coefficients and their respective RGB colors. This option is a hybrid approach that tries to automatically "guess" at a proper shading coefficient value given the raw (and corresponding) color imported from the file. As mentioned earlier, the shading coefficient is needed to create nice looking (nicely shaded) images in a photo-realistic rendering program. If this option is selected, then the specific shading coefficient will be derived directly from the relative intensity of the imported color that corresponds to this shading coefficient (diffuse color for diffuse shading coefficient etc.). For example, if the imported diffuse color is (0.4, 0, 0), which is 40% of full-bright red, then the diffuse shading coefficient will be set to 0.4 and the diffuse color will be modified to be (1, 0, 0). When the new color (1,0,0) and the new shading coefficient (0.4) ar multiplied together, it results in the original color imported from the file (0.4, 0, 0). In general you may wish to use the "Set and Use Default" option to get good rendered results.
Multiply Colors By Material Shading Coefficients
Inside Okino's internal scene graph each material has a "color" and a corresponding "shading coefficient" for each ambient, diffuse, specular and luminous color definition. The "shading coefficient" can be considered a variable intensity control that brightens or darkens its corresponding color, without having to modify the color itself.If this checkbox is checkmarked then each shading coefficient is multiplied into its corresponding color value before being exported to the COLLADA file material. Normally you would want this option enabled as it creates a COLLADA material definition which is very close in appearance to an Okino material definition.
If this checkbox is not checkmarked then only the raw colors will be output (ambient, diffuse, specular and luminous) to the COLLADA file and their corresponding shading coefficient values will be ignored. This will typically result in brighter, bolder and punchier materials, what we ourselves term "OpenGL" shading which tends to be more saturated than colors seen in photo-realistic rendering programs.
Set Specular Material Color to White
If this checkbox is enabled then the specular material color will always be set to white (although, the white can be dimmed by changing the 'Specular Coefficient' material parameter override, as described above). If disabled, then the real material's specular color will be output.Force 'RGB_ZERO' mode (for programs which display COLLADA models wrongly with inverted transparency)
Programs such as Google Earth v4 do not support the COLLADA 'A_ONE' transparency mode, so all imported objects show up completely transparent.In 'A_ONE' mode a
value of 1.0 is to be considered as fully opaque, not fully transparent, while in 'RGB_ZERO' mode a value of 1.0 is to be considered as fully transparent. Hence, if your destination COLLADA program or viewer does not support 'A_ONE' transparency mode, then enable this checkmark option. This will cause all exported opacity values to be 'inverted' into corresponding transparency values.